
Home Studio Setup for Rap Vocals: Gear, Room and Settings

A home studio setup for rap vocals comes down to five things: a dynamic mic 10 to 20 cm from your mouth, closed-back headphones, something soft hung behind you, an interface set so your loudest peaks land around -10 dBFS at 24-bit, and a de-esser on the first mix pass. A working starter rig costs about $310, a mid one about $480 and a pro one about $810, with maker prices below. Most guides stop at a gear list. This one gives the numbers: distances, levels, and the first settings on the vocal.
Disclosure: we make audio plugins and apparel at Ghostnote. Two of our products appear in one labeled section near the end, one of them free. Every other piece of gear here is made by someone else, and there are no affiliate links.
Get VEIL free
Our de-esser for rap vocals. Free, keyless, no account. Enter an email and the download appears right here.
A copy goes to your inbox. Unsubscribe anytime.
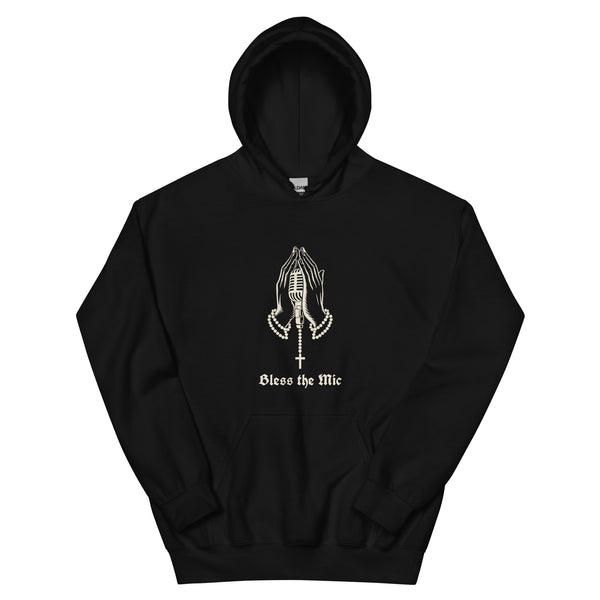
Or go further with Bless the Mic Hoodie ($54.99).
VEIL is yours. Pick your build.
What a rap vocal setup needs
A rapper's vocal chain is the same as a singer's or a podcaster's. What changes is the delivery: close, loud, punchy consonants and ad-libs that jump well above the verse. The list:
- A microphone. A dynamic for most rooms, a condenser for a quiet, treated one.
- An audio interface, unless the mic is USB. It powers and amplifies the mic and converts it for the computer.
- Closed-back headphones, so the beat stays out of the vocal.
- A stand with a heavy base, a pop filter (some mics have one inside) and a mic cable.
- A DAW. Which one matters less than knowing it; our piece on what DAW rappers use covers the choice.
- Something soft behind you: a heavy duvet does more for a home vocal than a pricier mic.

Three budget tiers: starter, mid and pro
Three rigs, each complete. Prices are each maker's own list price, checked 2026-10-23. Headphones are the same in all three because closed-back tracking headphones don't need to cost more to do the job.
Prices below are the makers' list prices, checked on November 21, 2026. That day Shure had the SM7B at $369 and the MV7X at $169 in a sale, so the mid and pro rigs cost less while it lasts.
Starter: about $310, USB, no interface
| Piece | Pick | Price | Why |
|---|---|---|---|
| Mic | RØDE PodMic USB | $209 | Dynamic, USB and XLR, so it moves to an interface later |
| Headphones | Sennheiser HD 280 PRO | $99.95 | Closed-back, up to 32 dB ambient attenuation per Sennheiser |
| Room | A heavy duvet you already own | $0 | Hung behind you, see the room section |
| De-esser | VEIL (ours) | free | First fix on a bright home vocal |
| Total | $308.95 | Plus a desk or floor stand you may already have |
Mid: about $480, XLR into an interface
| Piece | Pick | Price | Why |
|---|---|---|---|
| Mic | Shure MV7X | $199 | XLR dynamic; Shure says it needs no extra gain on most interfaces |
| Interface | RØDE AI-1 | $139 | One mic input with a level indicator, high-power headphone output |
| Headphones | Sennheiser HD 280 PRO | $99.95 | Same as starter |
| Pop filter | Shure PS-6 Popper Stopper | $44 | Clamps to most stands |
| Total | $481.95 | Plus a stand and an XLR cable |
Pro: about $810, the low-output dynamic route
| Piece | Pick | Price | Why |
|---|---|---|---|
| Mic | Shure SM7B | $439 | Built-in pop filter and air-suspension shock isolation per Shure |
| Booster | Cloudlifter CL-1 | $129 | Up to +25 dB of clean gain for passive mics; Cloud names the SM7B |
| Interface | RØDE AI-1 | $139 | Same as mid |
| Headphones | Sennheiser HD 280 PRO | $99.95 | Same as starter |
| Total | $806.95 | Plus a heavy stand and two XLR cables |
The condenser route for a quiet, treated room swaps the SM7B and Cloudlifter for a RØDE NT1 5th Generation ($249, XLR and USB, 4 dBA self-noise per RØDE) plus a pop filter. A cheaper booster on the pro route is the Triton FetHead (+27 dB, €69.95 on Triton's store). Neither booster can power a condenser: the FetHead uses phantom power itself and blocks it from the mic.
Dynamic or condenser for rap vocals?
For most home rap vocals, a dynamic. Shure writes that although large-diaphragm condensers are the studio standard, many engineers prefer dynamics for rap and aggressive vocals, because a condenser's extra detail and high-frequency sensitivity can work against those styles. The second reason is the room. A condenser hears more of it, and Sound On Sound notes that working very close to a condenser to cut room sound brings its own problems: loud breaths, mouth noise and too much low end from the proximity effect.
A condenser is worth it when the room is quiet and treated, or for sung hooks and soft R&B layers where detail is the point. If you rap and sing on the same record, a dynamic for verses and a condenser for hooks is a common split, but start with one mic and learn it.
Room treatment on a budget
Treat what sits behind you before what sits in front. Sound On Sound's Hugh Robjohns explains why: a cardioid mic already rejects sound from its sides and rear, so the reflections that hurt arrive from the wall behind the vocalist and bounce into the front of the mic. Absorbent material in an arc behind you, usually across a corner, stops them. His team found that a high-tog duvet did better than foam tiles, both acoustically and practically, and it hangs and comes down without marking the walls.
- Pick the spot. Neumann's home studio guide says to avoid room corners and reflective surfaces with the mic, but not to stand in the dead centre of the room either. A bedroom or living room is often good enough; a bathroom is usually too live.
- Face into the room, back to a corner. Hang the heaviest duvet or moving blanket you can find behind you, across the corner.
- Kill the noise. Move the laptop fan, fridge hum and street side out of the mic's front. Neumann flags fan noise from the computer by name.
- Add a reflection filter only if you face a wall. Sound On Sound says these on-stand shields mostly stop your voice going out into the room, and help most when the vocalist faces a nearby wall. Don't push the mic deep into the filter's curve.

Mic distance and the pop filter
Shure gives 10 to 20 cm (4 to 8 inches) as a starting point for most singers, and warns that on a cardioid mic the low end grows as you move closer. Neumann, filming with a large condenser, aims the mic at the mouth from 20 to 30 cm (8 to 12 inches). The two fit together: closer on a dynamic, a little further on a condenser.
| Setting | Dynamic (PodMic, MV7X, SM7B) | Condenser (NT1, NT-USB+) |
|---|---|---|
| Mouth to mic | 10 to 15 cm, about a fist | 15 to 25 cm |
| Pop filter | Built in on many; add one if your p's thump | Always, at least 10 cm from the capsule |
| Angle | Straight at the mouth | Pop filter tilted slightly off parallel |
| Ad-libs | Lean back 5 to 10 cm on shouts | Step back or turn slightly off-axis |
The pop filter numbers come from Neumann: mount the screen at least 10 cm (4 inches) from the mic and angle it slightly, so sound doesn't bounce between the screen and the capsule. Foam windscreens, it adds, are built for wind and dull the top end; a pop screen stops plosives better. The rule that matters most is Shure's last one: keep the distance the same for the whole take. A rapper who drifts from 10 cm to 30 cm changes tone and level from bar to bar, and no plugin fully hides it.
Gain staging: how loud to record
Record at 24-bit and leave headroom. Sound On Sound's technical editor advises leaving 10 to 15 dB of headroom, setting the level so peaks go no higher than about -10 dBFS, and not compressing on the way in, because a compressor printed on the recording can't be taken off later. Neumann says the same in its own words: at 24-bit, leave about 10 dB above the loudest peaks, and turn up the headphones, not the preamp, if the vocalist wants more level.
| What you see on the meter | Target | What to do |
|---|---|---|
| Verse peaks | Around -12 to -10 dBFS | Set the interface gain on the loudest verse, not the soundcheck |
| Shouted ad-libs and hook peaks | Under -6 dBFS | If they cross it, lower the gain 3 dB or lean back |
| Clip light or 0 dBFS | Never | A clipped take can't be repaired; record it again |
| Gain knob near the top and still quiet | Low-output dynamic | Add a FetHead or Cloudlifter, or use a hotter mic |
The ad-lib row is the rap-specific part. Rap ad-libs and hook shouts often hit several dB above the verse, so verse peaks set at -12 to -10 leave room for them to land under -6 instead of clipping. Raise the level later in the DAW; at 24-bit that costs nothing.
Headphones and monitoring
Use closed-back headphones and turn the speakers off while recording. Neumann's reason: open-back headphones leak back into the mic when you stand as close as a vocalist does, and speakers feed back. Three habits from the same guide save takes:
- Check the phase. Many interfaces and DAWs have a phase switch on the input. With headphones on, talk into the mic and flip it: one position sounds more direct. Keep that one.
- More level goes in the headphones. If the vocalist can't hear themselves, raise the headphone volume, not the mic gain.
- Never hang headphones on the mic. The feedback can damage speakers and ears.
Monitor the beat a little lower than feels exciting. A loud headphone mix pushes the voice to shout over it, and shouting changes the tone and the distance.
The recording chain into your DAW
The signal path, in order: mic, then the booster if you use one, then the interface's mic input, then the DAW. USB mics fold the interface into the mic. In the DAW:
- Set the project to 24-bit, as Neumann and Sound On Sound both advise.
- Arm one mono track per vocal part: lead, doubles, ad-libs. Doubles and ad-libs on their own tracks get their own processing later.
- Record dry. No reverb printed, no compression on the input.
- Name takes as you go, and keep the best full pass before comping lines together.
- Make the beat a little quieter in your headphone mix than in the final song, for the reason above.
Which DAW does not change any of these numbers; Logic, FL Studio, Ableton Live and Pro Tools all do the same job here.
The first processing pass
Once the take is clean, the first pass on a rap vocal follows a fixed order, set out step by step in the rap vocal chain, in order. The starting numbers from our own guides:
| Step | Starting setting | Full guide |
|---|---|---|
| 1. Subtractive EQ | High-pass at 80 to 100 Hz on most male voices; 1 to 3 dB out of 150 to 500 Hz if boxy | EQ settings for rap vocals |
| 2. De-esser | 3 to 6 dB of reduction on the loudest esses, nothing on the rest | De-esser settings for rap |
| 3. Fast compressor | 4:1, 2 to 4 dB of gain reduction on the loudest bars, attack 1 to 3 ms | Vocal compression settings for rap |
| 4. Slow compressor | 2:1, 2 to 3 dB on average phrases | Same guide |
| 5. Tonal EQ | 1 to 2 dB wide at 3 to 6 kHz for presence | EQ guide |
The de-esser goes early because a compressor reacts to loud esses by turning down the whole word. A bright home vocal through a close dynamic or a condenser almost always needs one; VEIL, below, is ours and free.
What is the 3:1 rule?
The 3:1 rule is about spacing two or more microphones, not about mouth distance. Shure states it for choirs: if the first mic is 3 feet from its source, the next mic goes 9 feet from the first, three times the distance. Mics placed closer together pick up the same voice at slightly different times, and mixed together they cause comb filtering, a hollow, phasey sound.
At home it applies in two cases: two vocalists recording at once on two mics, and a vocalist recorded by a vocal mic plus a second mic in the room. Keep the two mics at least three times as far from each other as each one is from its own vocalist, or record one at a time. A solo rapper on one mic can ignore it.
From Our Own Line
Two of ours fit this setup.
VEIL, free. A de-esser for vocals that turns down s, sh, ch and ts sounds and leaves the body of the voice, below about 1.6 kHz, untouched. Press LEARN, play 10 to 30 seconds of the vocal, and it sets SENSE, CROSSOVER, RANGE and RELEASE for that voice; UNDO puts them back. Its Removed listen mode plays only what it takes away, so you can check you hear esses and not words. VST3 on macOS and Windows, Audio Unit on macOS, keyless: enter an email on the product page and the download appears.

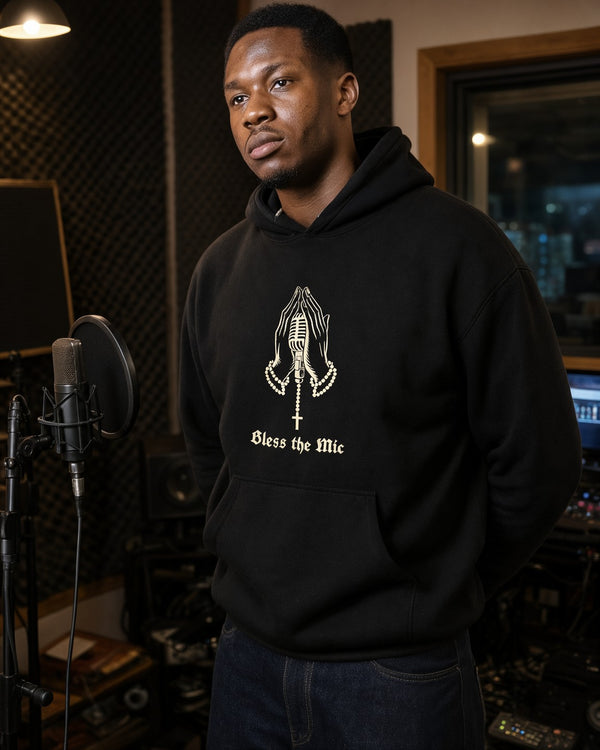
Bless the Mic hoodie, $54.99. Home booths run cold when the heater or air conditioning is switched off to keep its noise out of the mic. Ours is a midweight 271 g/m² hoodie in 50/50 cotton-polyester, with a double-lined hood, ribbed cuffs and a praying-hands-and-microphone illustration in cream on black, sizes S to 2XL. More on why rooms run cold in why recording studios are so cold. Most orders arrive in 3 to 10 days, depending on your location.

Frequently Asked Questions
Which DAW is best for rapping?
The one you already know. Logic Pro, FL Studio, Ableton Live and Pro Tools all record a vocal at 24-bit with the same result; the settings in this guide apply to each. Our piece on what DAW rappers use compares them.
What is the 3:1 rule in recording?
A spacing rule for two or more mics: each mic should sit at least three times as far from the next mic as it is from its own source. Shure states it for choirs. It prevents comb filtering when two mics hear the same voice, so it matters when two vocalists record at once.
How loud should I record rap vocals?
At 24-bit, set the gain so verse peaks sit around -12 to -10 dBFS and the loudest ad-libs stay under -6 dBFS. Sound On Sound advises peaks no higher than about -10 dBFS and no compression on the way in.
Do I need a condenser mic for rap?
No. Shure notes that many engineers prefer dynamic mics for rap, and a dynamic picks up less of an untreated bedroom. A condenser makes sense in a quiet, treated room or for sung hooks.
How far should I be from the mic when rapping?
About 10 to 15 cm on a dynamic and 15 to 25 cm on a condenser with a pop filter. Shure gives 10 to 20 cm as a starting point for most voices. Keep the distance the same for the whole take.
The plugins in this guide
The Ghostnote tools this piece is built around. VEIL, our de-esser, is free.